
How to use the knowledge base
Where the knowledge base lives
The knowledge base is a public site — no login required. You can open it directly, or reach it from the Knowledge Base link in the enSights portal. The header carries three links that stay with you on every page:
- Knowledge Base — back to the home page from anywhere.
- What's New — the product changelog: new features and changes, newest first.
- Go back to enSights.ai — returns you to the platform.
The home page
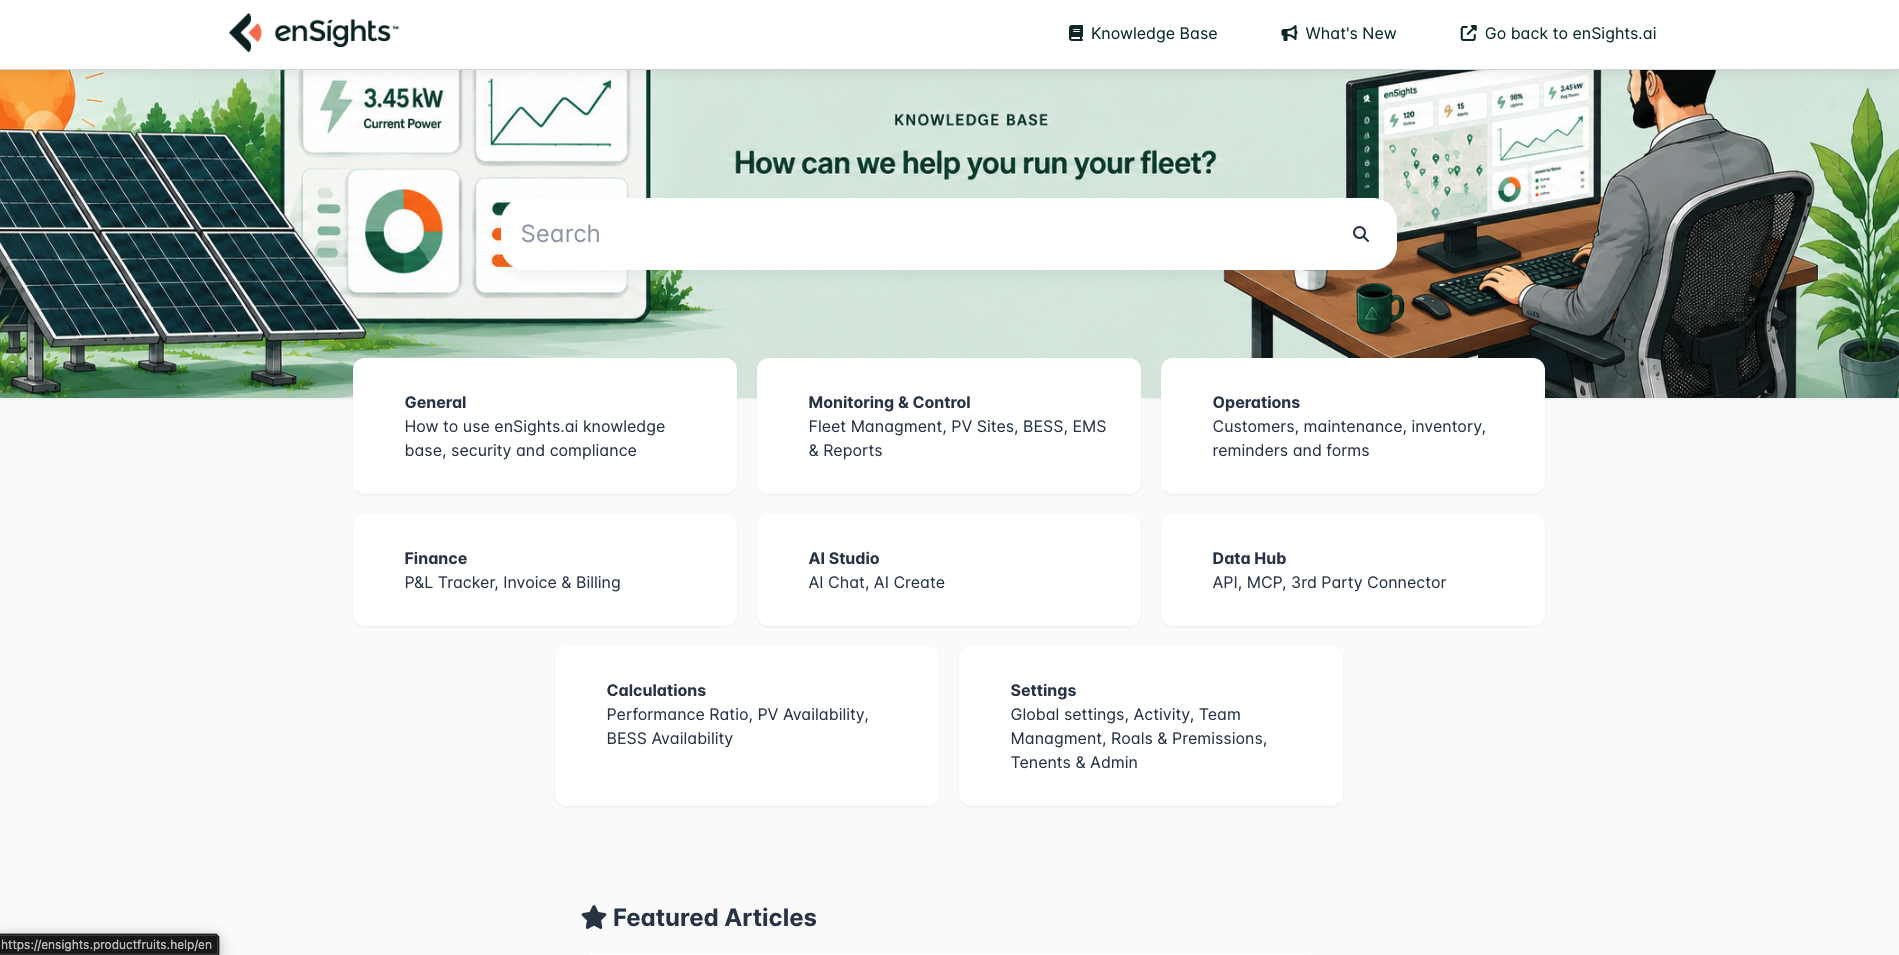
Three things sit on the home page, in the order you are most likely to want them:
- Search — the large field at the top. This is the fastest route to an answer, and it searches the full text of every article, not just titles.
- Category cards — one card per top-level category, each listing the sub-categories it contains. Use these when you want to browse a whole area rather than hunt for one fact.
- Featured Articles — a short, hand-picked list. Good starting points if you are new.
Searching
Search is usually the right first move. A few things worth knowing:
- It matches on article body text, so searching for a column name, a status label or an error message you see on screen will usually find the page that explains it.
- Results appear as you type — you don't need to press Enter.
- Search using the exact wording the product uses. If a screen says "Expected WA Power", search that rather than "expected output".
- If a search returns nothing, drop back to a single distinctive word — clipping, cleaning, inverter — rather than a whole phrase.
Browsing and the article view
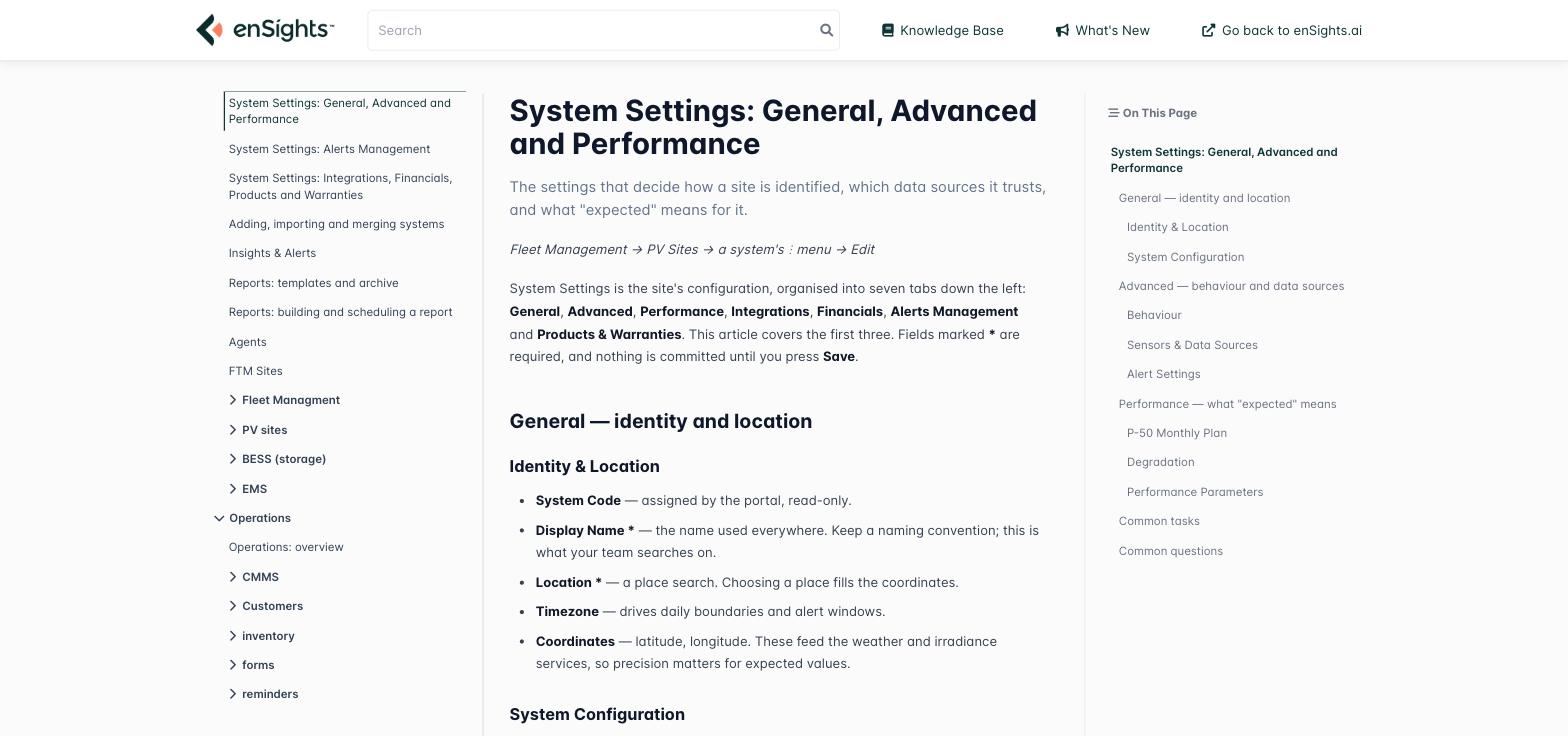
Once you open an article the layout gives you three tools at once:
- Left navigation tree — the full category structure, with the article you are reading highlighted. Categories expand to show their sub-categories and articles, so you can see what else covers the same area and move between neighbouring pages without going back to the home page.
- Article body — the content itself, in the middle column.
- On This Page — a table of contents on the right, built from the article's headings. On long reference articles this is the fastest way to jump to the one section you need, and the entry for the section currently on screen is highlighted as you scroll.
How the tree is organised
Categories match how the product is organised, not how the documentation was written. A screen you are looking at in the portal is documented in the category with the same name, under the same sub-section — if you are on the Service Calls screen in the platform, the article is in Operations → CMMS.
Finding the article for the screen you're on
- Note the exact name of the screen or the field you're stuck on — the wording in the portal's left nav, or the column header.
- Search the knowledge base for that wording.
- If nothing looks right, open the category card matching the portal section you're in and scan the article list — every screen has its own article.
- Use On This Page to jump to the relevant part rather than reading the whole article.
What's in an article
Most articles follow the same structure, so you can skim rather than read:
- What the page is for — one short paragraph on the job the screen does and who uses it.
- Reference — the meaning of every column, filter, control and status on that screen. This is the part to search when a number or label is unclear.
- How to — numbered steps for the common tasks.
- Screenshots — taken from the live product, so what you read matches what you see.
- Notes and gotchas — behaviour that is easy to get wrong.
Some articles go a level deeper and explain a metric rather than a screen — how it is calculated, with a worked example. Those are worth reading once, in full, rather than skimming.
Telling us whether it worked
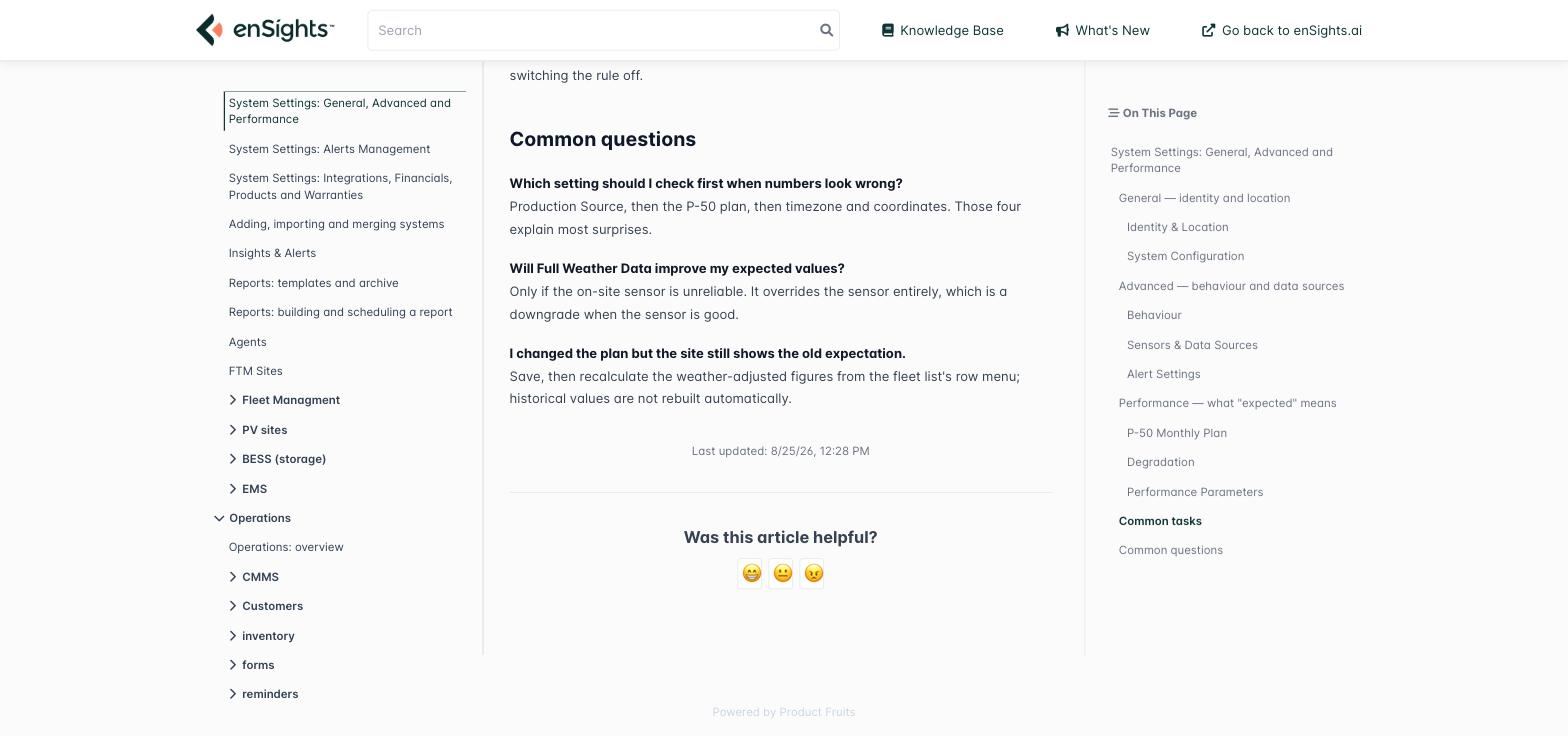
At the bottom of every article you'll find two things:
- Last updated — the date the article last changed. If it looks old relative to a feature you know changed recently, treat the article with a little caution and tell us.
- Was this article helpful? — three faces: helpful, partly, not helpful. One click, no form.
That rating is the main signal we use to decide what to rewrite and what to write next. If an article didn't answer your question, rating it is more useful than closing the tab.
Tips
- Bookmark the articles you use weekly. Every article has its own stable URL, so a bookmark or a link pasted into a team chat will keep working.
- Link to a section, not just an article. Clicking an entry in On This Page puts an anchor in the URL — copy it from the address bar to send a colleague straight to the paragraph you mean.
- Check What's New after a release. It's shorter than re-reading articles and tells you what actually changed.
- Read a section's overview article first. Each major section has one, and it explains how its screens fit together — usually the missing piece when an individual page seems arbitrary.
Can't find it?
If the knowledge base doesn't cover what you need, or an article no longer matches what you see on screen, rate the closest article as not helpful and contact your enSights representative. The knowledge base grows with the product, and gaps get filled in the order people report them.